Week 6 - Implementing Camera Calibration
Hi, welcome to my week 6 update! This week, I implemented the whole process of camera calibration that allowed me to get the parameters of a camera.
Note: It is highly recommended to view this blog post on my personal blog site: https://www.jessexu.me/basis-senior-project/week6/
Run it yourself!
The program for this week is a little special. Since camera calibration is a compute-heavy task, it may take about a minute to process the images. Please stay patient and avoid starting the camera calibration process repeatedly in a short time, or the server may crash. Thank you!
https://senior-project.jessexu.me/?file_selection=Week+6
Camera Calibration
I learned that to calibrate a camera, we need to take several photos of a checkboard with the camera. So, I took 15 pictures of the 7*9 checkerboard I printed last week with my phone (it will be replaced with a microscope camera in production).
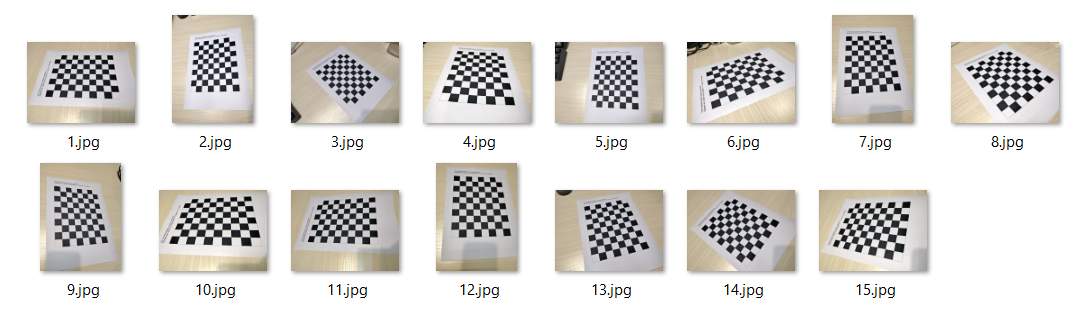
Then, for each image, we find the chessboard corners with OpenCV, and put the results into two lists: object points and image points. As shown in the following code.
1 | file_list = glob.glob("camcalib/*.jpg") # List all images |
(This is the basic process for finding the objpoints and imgpoints, but the code was slow due to mass calculations and the single-process nature of Python. So, I also learned the multiprocessing package in Python to utilize multiple CPU cores in calculation, which massively boosted the calculation.)
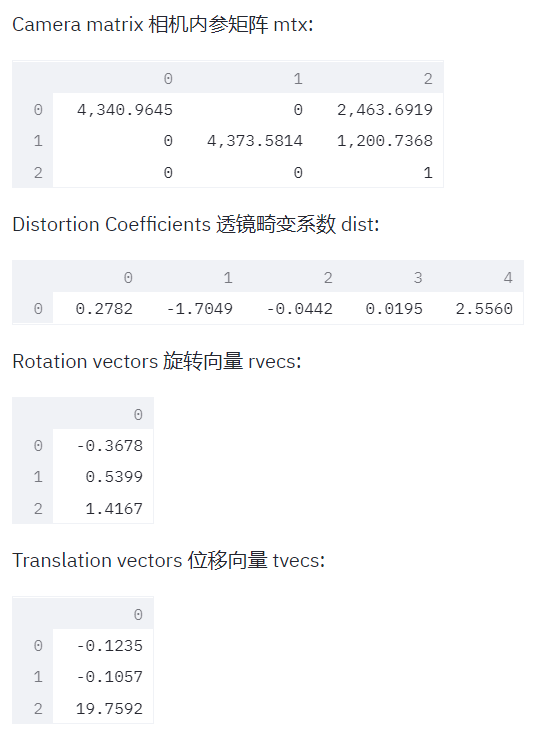
With all the object points and image points, we can now calculate the parameters of the camera. Simply put that data into OpenCV’s calibrateCamera() function, and it will return the camera matrix, distortion coefficients, rotation vectors, and translation vectors.
1 | image = cv2.imread("camcalib/1.jpg") |
You can see the results of calibrateCamera() in the following screenshot:
With these parameters, we may measure lengths of objects in the images. However, I decided to undistort the images first though the phone camera should not have much distortion. Doing so may lead to more accurate results, and, in my case, check if the camera parameters produced by calibrateCamera()are legitimate. (You will see why in a moment.)
OpenCV provides an easy way to undistort an image, that is, the undistort() function. Just put an image, the camera matrix, and the distortion coefficients into the function, and voila!
1 | undistorted = cv2.undistort(image, mtx, dist) |

However, if you look closely, you will find that the image does not look right. The undistorted image is obviously distorted, even worse than the original image. This proves that the camera parameters we got from calibrateCamera() aren’t right. I don’t know what led to this result, but I am guessing that maybe the paper was not completely flat, or the orientation of some of the photos taken impacted the result.
Summary
This week, I dived further into camera calibration and got some parameters of the camera from calibrating it. However, the results were flawed, and it needs to be fixed before we can make any measurements with the images. Next week, I will try to fix the results of calibrating the camera.